CATERILLAR D4-7U BULLDOZER IN NZ
STEERING CLUTCH removal process
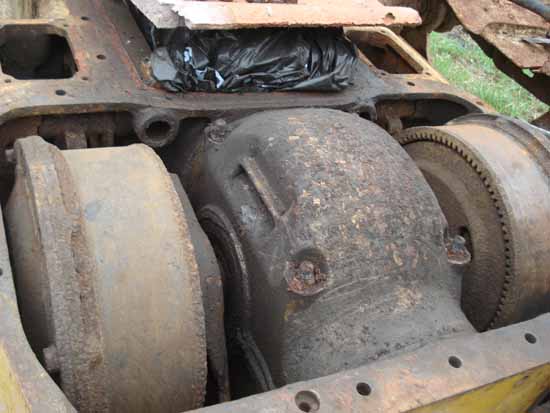
The D4 work to remove and repair steering clutches is not as bad and above pic shows final drive with steering clutches. The Bevel gear is bolted to the bevel gear shaft above being the middle section with 4 bolts. You need to rotate the tracks to take off the bolts on the steering clutches covers and we use a strop onto an excavator to drive the track around. You can just see 2 bolts on your left side. If they don't free up just hit them with a hammer & replace all the bolts.
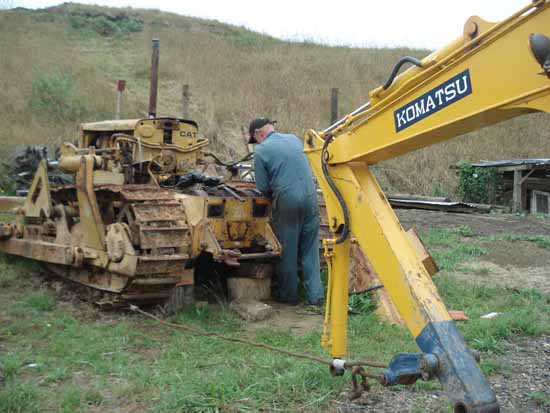
The above we used a strop to draw the track around so we could undo the bolts holding the steering clutch casing on both clutches. Note the rear of the bulldozer is off the ground and the front is also supported so makes life easier.
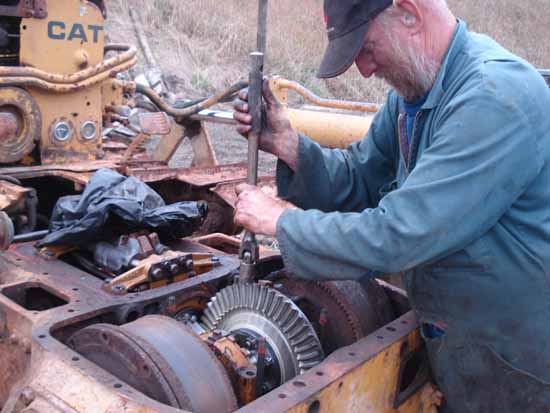
After taking the bolts off the steering clutch housing or bevel steering shaft housing we then take the bolts holding the final drive. There are 4 main bolts and they are normally easy to remove. You then need to prise the steering clutch side casing over so that the whole unit will be raised up and taken out. The side cover on the far left and right remain
STERING CLUTCH INFO
| Clearance between shaft & Pressure plate bush |
.002" -- .004" |
| Max allowed clearance |
.015" |
| Clutch springs outer in pounds pressure |
161-178 |
| Clutch springs inner in pounds pressure |
123-136 |
| Clutch springs inner in pounds pressure compressed |
2 13/16" |
| Steering clutch min width |
3 1/8" |
| Steering clutch normal width |
3 7/16" |
| Steering clutch maximum width from face inner clutch & p.plate |
3 5/8" |
| Steering clutch inner drum-to-shaft pressure in tonnes |
20 |
| Steering clutch lever badjustment, free play |
3" |
Exposing the steering clutches
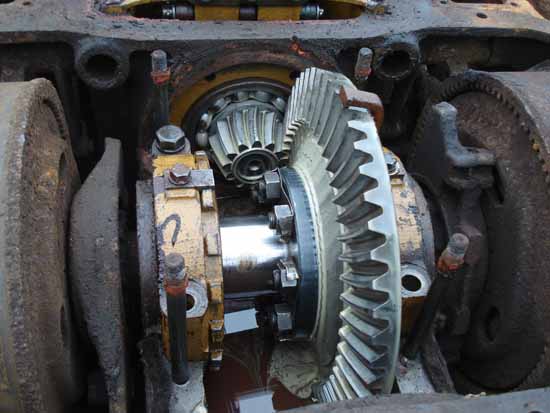
Showing the 4 main bolts holding the final drive so we can then lift out the whole set of steering clutches & bevel gear as one unit
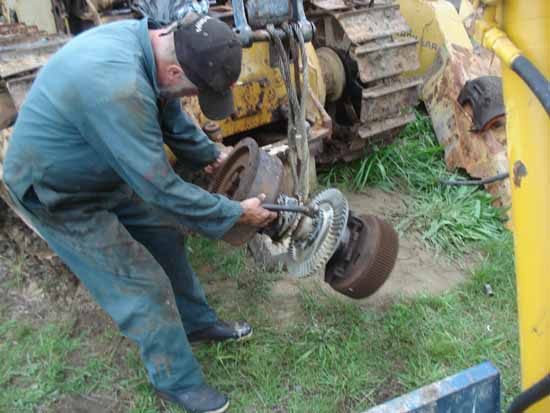
We used our excavator to lift out the steering clutch and bevel gear assembly for inspection and here it is. Our bevel gear is OK but the steering clutches mainly the left side have rusted up firm
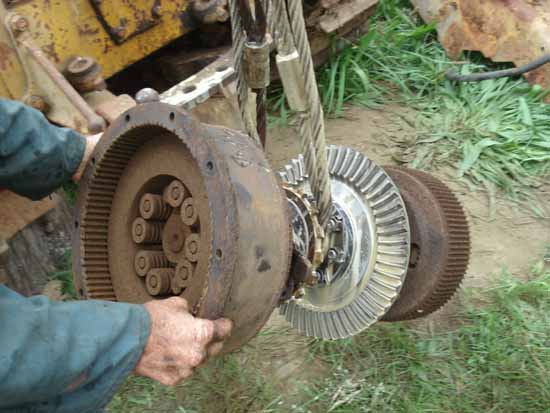
The final drive had signs of water and the left side which is our trouble side seemed like it was clogged up with rust a tell tale sign once we checked the steering clutch & removed the outer casing as you can see above
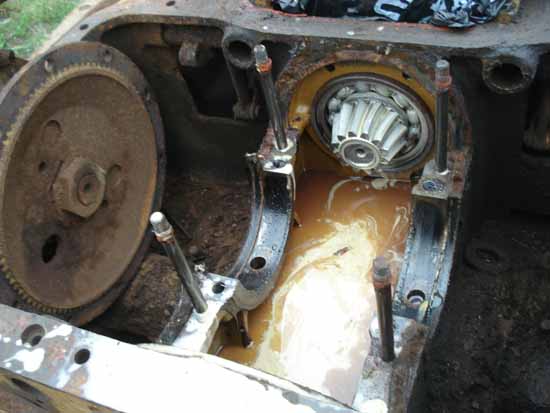
The rear bay once the steering clutches & bevel gear are removed & bevel gear housing has some water in it but the gears etc are excellent. Lots of sludge and dirt in the steering clutch housing which needs to be removed and cleaned out but click on below and read more of what we are doing to page 16.
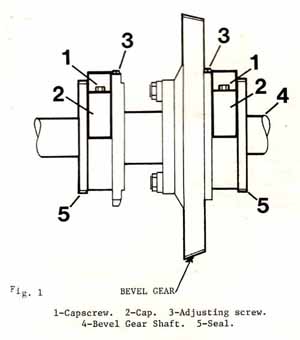
BEVEL GEAR: If you have to dismantle the bevel gear is bolted to the bevel gear shaft. To replace remove the cover. After the cover is removed take off the steering clutch arms, trunninons then disconnect the brake linkage, remove the bevel gear guard [ dog house ] remove capscrews from the steering clutch drums, push and prise the drums to the centre of the bulldozer. Loosen steering clutch shaft adjusting nuts [3] remove capscrew [1] remove caps [2] & mark them so they return to the original position. Make a sling & remove assembly.See Fig 1
You can wash and clean out the steering clutches & brakes if oil, grease etc creeps in. Theres 2 drain plugs under the clutch housings. Wash when Cat is cool not hot. Use non flammable liduid remove small covers from the back of the transmission case directlky behind each clutch, Fill each so each clutch is in approx 4" of fluid. DONT RELEASE the steering clutches but move the machine forward & back about 25metres each time say 3-4 times. Then drain the fluid & see repeat if it doesn't clear. Uselk clean fluid the operate the CAT back and forth engaging the steering clutches & apply, release brakes as well. Repeat if dirty drain etc Tie the steering clutch levers back and release clutches so fluid can drain out. MAKE SURE you lubricate release bearings & replace drain plugs.
If you wish to share any CatD4-7U info please send us email. We are happy to add information for you on our website especially parts comments, problems, pics of your machines ---etc & we can list your parts for sale or wanted to buy on our website [ D4-7U bulldozer Forum ad ]
JUST EMAIL US

More [ D4-7U work next on steering clutches 2 3 4 5 6 7 8 9 10 11 12 13 14 15 16 ] [ D4-7U bulldozer latest Oct 2010 pics ] [ D4-7U bulldozer pics ] [ D4-7U bulldozer pony motor ] [ D4-7U bulldozer Birtley blade ] [ D4-7U bulldozer USA parts ] [ NZ suppliers of CAT & Komatsu parts ] [ D4-7U pony motor & add Honda starter ]
We are also suppliers of NEW Komatsu spare parts for PCs up to 4 tonne as well looking for agents to buy our [ retread truck and bus tyres ]. RUBBER EXCAVATOR TRACKS FOR SALE all models : [ RUBBER TRACKS ] [ Kiwi bulldozer parts links ]
|


 Email us: